Monster Inspired Crafts
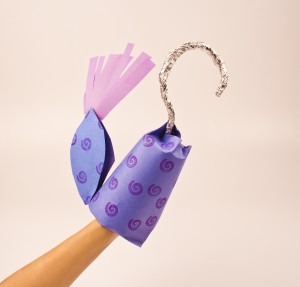
Monster Pirate Hooks
These fun and easy pirate hooks make for a great afternoon game of dress up with your little mateys!
Supplies:
- A roll of tinfoil
- A Solo cup
- Blue and purple construction paper
- Markers
- A pipe cleaner
- Tape
- Scissors
Steps:
Body
- Decorate your blue construction paper with purple polka-dots, swirls, or squiggles
- Puncture a hole into the bottom of the cup
- Wrap the cup in blue construction paper, leaving extra paper on both ends of the cup
- Wrap the paper around the edges of the cup, making sure to leave the hole on the bottom accessible
- Roll a piece of tinfoil into a cylindrical strip and mold it into a hook shape. Then stick the hook through the punctured hole
Tail
- Cut out both sides of the tail and tape them to either side of the pipe cleaner
- Cut strips of purple construction paper, fan them out and tape them together at the base. Tape them between the two tips at the end of the tail.
- Slightly bend the end of the pipe cleaner and tape it to the base of your project

For a more simple party hook, just wrap your cup in wrapping paper and have yourself a swashbuckling time!
Monster Matey Pirate Ship
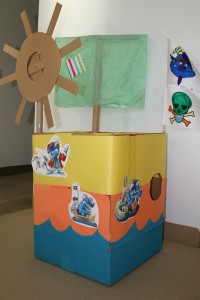
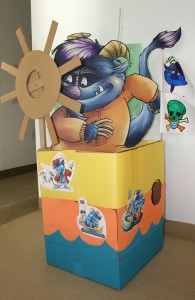 Not only does this activity give you and your Mighty Kid lots of quality bonding and crafting time, but you’re left with a Monster Needs a Party themed fort when the job is done! A few of these steps are for grown up mateys, and some are for little mateys, so be sure to divvy up the tasks. Here’s to many days of pirate ship fun!
Supplies:
- Hot glue gun - one that’s loaded and ready to go
- Packaging tape
- 3 cardboard boxes - 2 small, 1 large
- 2 wrapping paper roll tubes
- 2 paper towel roll tubes
- Tissue Paper
- 1 metal brad
- Scissors
- (An exacto knife for the grown-up)
- Monster Matey Flag
- Pirate Flag
- Monster Cutouts
- 1-2 long wooden dowels
- Markers, crayons, construction paper, paint, paintbrush, or any other supplies you wish to use for decorating
Steps:
Ship Body: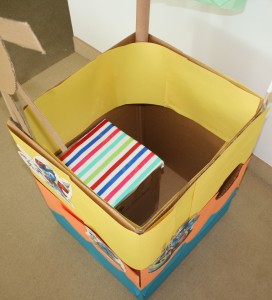
- Tape construction paper to the outside/inside of your boat, and paint it as desired -- decorate however you like! We chose to paint on some waves.
- Print/cut out Monster Cutouts and use them to decorate your ship!
- Tape one of your small boxes shut, and decorate it. (We wrapped ours in wrapping paper.) Then place it inside the boat – this is your steering wheel seat!
- GROWN-UP: cut a window hole in the side of the boat using an exacto knife, or a pair of scissors
Steering Wheel:
- Break down one of your small boxes, and cut a circle in the middle of one of the flaps
- Cut strips from a different flap on that same small box
- Use the hot glue gun to affix the handles (strips from small box flap 1) to your steering wheel body (circle from small box flap 2)
- Tear off a third flap from your small box and attach it to the back of the steering wheel with the metal brad. (This is your steering wheel’s support)
- Hot glue a wrapping paper tube to the back of the steering wheel support
- Affix the steering wheel above the decorated seat – it should spin!
Sail
- Tape the two paper towel rolls to the top of the wrapping paper roll, making a T-shape – now you’ve got a mast and boom for the sail!
- Affix the tissue paper to either side of the T-shape, making your sail – decorate the sail as desired
- Affix the sail to the back of your boat (opposite side of your steering wheel station)
Flags of Allegiance
- Print out the Monster Matey Flag for your mighty matey to color in, however they want
- Print out the Pirate Flag for your mighty kid to also decorate to their pirate heart’s desire
- Hot glue the two wooden dowels together, end to end
- Attach your mighty kid’s flags to the wooden dowels
- Affix the flagpole to the side of your boat to prove your boat's allegiance to Monster!
Now you’re ready to set sail on the open sea with Monster and Boy!
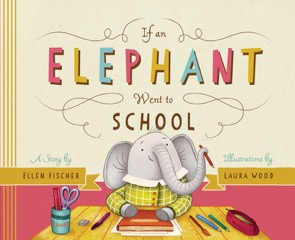
"Handmade" Elephant Friends
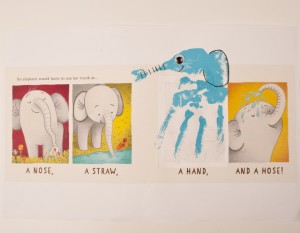
Handprint Elephant
Your mighty kid can now lend a hand to Elephant's story with this project! Using this sneak peak into the forthcoming book, your child can use their hand print to create an elephant of their very own. Before you and your little one get started, you will need to print off the Elephant Spread provided (and tape the two pages together).
Supplies:
- Paint - your choice of color!
- Glue
- 1 googly eye
- A black pen
Steps:
- Have your little one cover the palm side of their hand in paint
- Stamp your mighty kid's hand down on the blank space in the spread and wait 10 seconds
- Carefully lift hand off the paper and let the paint dry
- Once the paint has dried, draw the outlines of the elephant's ear, mouth, and trunk marks
- Gently glue the googly eye in place
- Hang the artwork up on the refrigerator!
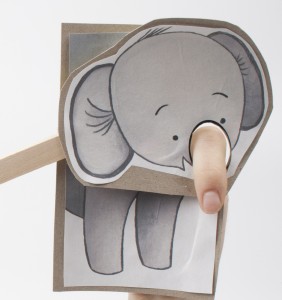
Elephant Finger Puppet
Elephant lost her trunk, and she needs YOUR help! Use your finger to help Elephant feel like herself again. Before you begin, print out the Elephant Body Parts and cut them out!
Supplies:
- Glue-stick
- Hot glue gun
- Scissors
- (Exacto-knife)
- Cardboard
- Popsicle stick
Steps:
- Glue Elephant's body to a piece of cardboard, and glue her head to a separate piece
- PARENT ONLY STEP: Using an Exacto-knife, or a pair of scissors, cut out the hole in Elephant's face, where her trunk should go! (Make sure there is a matching hole in her body, so your Mighty Kid's finger can access her face hole.)
- Glue a popsicle stick between Elephant's body and her head
- Place your finger through her face and help her smell, slurp, grab, and spray once more!


Add new comment